No matter how advanced and immersive 3D modeling gets, it will probably pose no threat to models built by hand or generally any model that is erected in three dimensions.
Architects use model making techniques as their mean to evaluate the space composition of different components of their design in scales smaller than real-world size. It will make them best grasp complex connections among different elements of their work.
Architecture models are sort like of the architectural drawing and sketches architects draw to show a built structure or sometimes just portray a certain quality of their work, only in the more comprehensive world of three dimensions.
Just as a crafty architect shows the feeling of a certain standing-point to their design in his intuitive makeshift sketches, with architecture models, they try to exhibit a certain quality of a portion or the whole of their work through architecture model making.
As 3D computer-aided modeling is mainly depicted over a 2D computer screen or printed out -again- on 2D sheets, they won’t come close to 3D hand-made models in giving a clear view of the building from any given angle.
Plus, handmade models are used to be easily manipulated and adjusted toward the architect’s vision. That might come at a time price when using a Computer-based 3D model.
Here I enumerate principles that any model builder worth-their-salt stands by. Let’s get down to it.
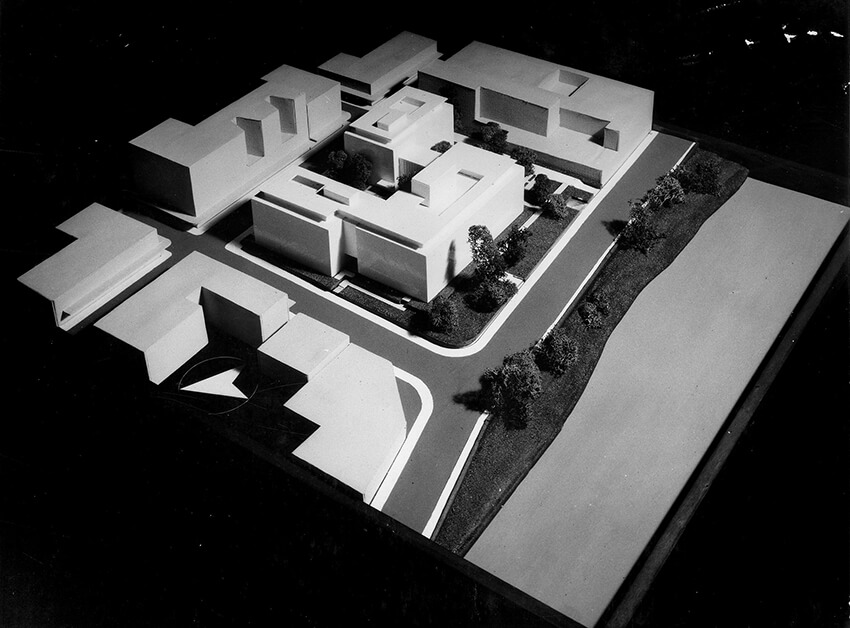
1. What Do You Have In Mind?
First, you have to make sure you have a clear picture of what you have in mind; or at least the quality you’re looking for. The process of architecture model making may vary depending on that picture or quality.
Sometimes architects build models to replicate their final construction in a smaller scale identically, or they sometimes grapple with different material to show a concept they are pursuing their design or even sometimes a crude prototype of how their building’s volume roughly would look like.
As your model gets closer to the constructed version of your building, this clear picture that I mentioned earlier, gets bold.
But when we slide through the spectrum toward models that try to maybe-implicitly express a concept rather than the body of a building, the significance of having a clear picture in mind from the outset blurs out.
The architect might rearrange, alter or sometimes even have a total makeover along the way. That’s precisely the purpose of molding raw material to gingerly get to what he or she feels like is the perfect shape they were hunting.
The choice of size, material, and the level of detail in your model is determined after you’ve made peach with your purpose and that so-called vision. Depending on your project’s scale, whether a small interior renovation or all the way to an urban project, the level of detail varies.
Again, they’re all addressed by the picture you either vividly have in mind, or the vague vision you’re trying to turn to reality.
2. Think Twice, Cut Once, And Then Repeat
Nobody’s ever regretted thinking twice; and not just in architecture model making. Plan out exactly what you need to do before rolling up your sleeves and get all dirty with cutting and gluing.
The same notion could be applied to a broader scope. Your whole timeline for building different fragments of your model has to be planned out from the beginning; you never want to have an unfinished model that requires the viewer’s imagination to fill the gaps.
So you have to scribble at least a rough plan for how long each step will take and planning for each part is a must and has to be chimed into your time and plan management.
Once you get used to this triangle of Planning, Execution, and Repeat, upon every step, you’ll find yourself better prepared to go about building each part, regarding finding the best solution to how to put up every segment of your model.
3. What’s the Right Scale in Architecture Model Making?
The scale is sometimes what makes an ill-constructed model to just what’s needed to display the intended message; or vice versa, it could squander the purpose in architectural model making techniques.
The reason lies in the fact that scale is the determining factor in the amount of detail that your model wears. Nothing says smaller scale speeds up the process; rather it may invite meticulous micro-scale work that’s quite as hard and time-consuming.
Depending on what your model covers and what it includes, its scale might vary between 1:10 to 1:300 when it comes to architects. Landscape plan experts and urban designers deal with a range of between 1:500 and 1:3000.
4. Material as Your Language
The attribute that calls the shots when choosing the dominant material is your design’s feel or its narrative to say in another word.
You have to make sure that the plain, sullen sight of an all-cardboard model is totally in keeping with your purpose and is intentionally made this way. Otherwise, it will strike your viewer as cursory.
The material you choose also has to be convenient to work with; be malleable to be shaped into what you have in mind. Plus it has to be cheap; one of the perks of choosing cheap material in architectural model making techniques is that it allows you to refine, make changes, and even do makeovers without a second thought.
There is a wide range of material you could use in your model; the most widely-used ones include white foam board or foams in general with different colors, textures, and thicknesses; board cork (those grainy brown, somehow foldable thick sheets), and wood.
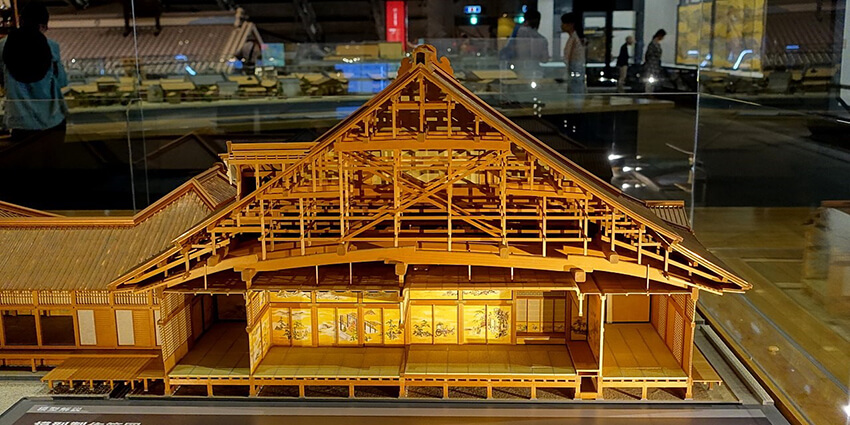
- How to hold it all together
An essential element of any model is what holds it all together. You wouldn’t want to take a model to your employer that falls apart with any little breeze. Or else you don’t want to overuse the glues and clumsily scrabble the glue all over your model; creating a spider’s net drawn over your work!
By knowing different types of glues and tapes, you’ll be able to choose the best adhesive for any given pair of materials.
5. Bring on Your Tools!
Construction phase on any architecture model making can be broken down into two main parts; Cutting and Assembling. We’ve already talked about how to approach the numerous types of attaching means. Here I mostly talk about the ways to cut stuff!
Precise cutting is what differentiates a good enough work with a great one. It could potentially add a higher layer of tidiness that would conspicuously bum the viewer out otherwise. To help smooth out the path to having this cleanness in your model, you need to use high-quality tools or architecture software. Of course, here comes the threat of cutting yourself which you have to be alarmed for. In cutting almost all foam or cardboard-based materials, you need to put a set of rules of thumb to practice.
Like for instance in gouging out any holes in 2D cards (in case of shaping out any openings like windows or doors), you have to make sure you don’t draw your cutter all the way along each side of the opening. You have to leave the cut you’ve made just before the angles and rotate your knife instead and make a fresh cut in the other direction.
This way you won’t end up with edged out cuts at the corners. Another rule in fabricating your material while cutting is to avoid through cuts and scoring instead; meaning you can put light pressure while making a cut and repeat doing so a couple times instead of making a strong pushy cut that doesn’t give a second chance to missteps.
- Laser-cut your design
If you’re willing to loosen up your pocket a little and you’re not sure your hand cuts won’t quite cut it, after adjusting your 3D modeling computer file you can let the laser take the rest. But you need to know it doesn’t work like a genie; then comes putting up a pile of different parts that could easily turn into a head-scratcher and possibly a nightmare.
There are some tricks like numbering your parts in a sequence that would help you advance with attaching different cuts in a straightforward order.
6. Light it Up
Back when I was in college, I remember I almost had a falling-out with my family overturning on every lamp in my room. But I was vindicated at the end because it turned out that inadequate lighting can quickly make your eyes tired and halt the model-making process.
So make sure the environment you’re probably spending a couple extreme hours is adequately lit. There’s also another upside to this; where you can take expressive, transparent photos from your model when you’re through or along the process.
7. Then Settle
Architecture model making is often about real built environments erected out of the earth and so are eventually bogged down to the soil at the end.
They have to be sewn to their context. A base or an anchor gives a feeling of the reality your project is hoped to end up in and steers clear of being afloat which causes nothing but ambiguity.
8. Repeat, Repeat, Repeat
This procedure might seem irrelevant but bear with me! A shared tenet of learning any field of craftsmanship is working alongside a master as see how he goes about his work close up.
There are countless nuances in his or her work that can only be appreciated by imitating what the master does and do so under their supervision.
A lot of common architectural model making techniques are encountered by all architects, even those who’ve built the worst models ever. Learning from your mistakes and thus accumulating experience is what can only be achieved by practicing. A motto that cold transcend model making; although I’m not going to go further than that.
9. Wash Your Hands
Washing your hands more often than you do, (like every hour) might seem a bit too much to some but especially when you’re working on bright material, stains could ruin the overall face of your work; Smudges which you’ll get used to throughout your exhaustive feat to finish up the model and of course won’t leave you any solution when you’re through.
Conclusion
Architecture model making at its perfection might seem like a hobby, but once you get down to the bottom of it, it could turn into a real agony.
Progress in any craftsmanship (model making included) is only possible by gaining experience and sticking to a set of proven rules of thumb. The ones which I dug into here.
Treading carefully on a single line of thought from the beginning, choosing the right scale, material, tools, and having a repetitive workflow that’s made of a cycle of planning and constructing is what makes you go all the way; if coupled with the practice of course. Our architectural model making service can help you in this process.
What have you learned from your mistakes that shape your very own experience in this field? Share your thoughts in the comments section below.








Comments